
When teaching Volleyball in Physical Education lessons, it is helpful to have a range of activities, teaching models and styles in the toolbox to help ensure students make great progress. Volleyball lessons can be delivered in a range of ways depending upon the age, group size, resources available and your level of knowledge of the game.
Due to the complexity of Volleyball, most PE classes will have a vast disparity of abilities. From students who have been playing for a club for years to those who may have never played in their lives. Thus, you will need a range of activities and tasks in order that all students are optimally challenged. From individual skill activities, cooperative tasks and rallies, to skill specific activities. It may also be advantageous with older students to utilize the experience in the class by adopting a 'Cooperative Learning' teaching model such as 'Jigsaw'. By which, students can be in mixed ability teams/base groups where they practice and develop skills together cooperatively. After they can compete against members from other teams/base groups of similar abilities . Whereas, with less able students it may be more beneficial to use a more 'traditional' teaching model where pupils progress through a range of teacher led activities and skills before progressing to playing games.
Below are a few Volleyball activities, example skill card and teaching considerations taken from the ‘Full Volleyball Pack’ that you can use in your lessons.
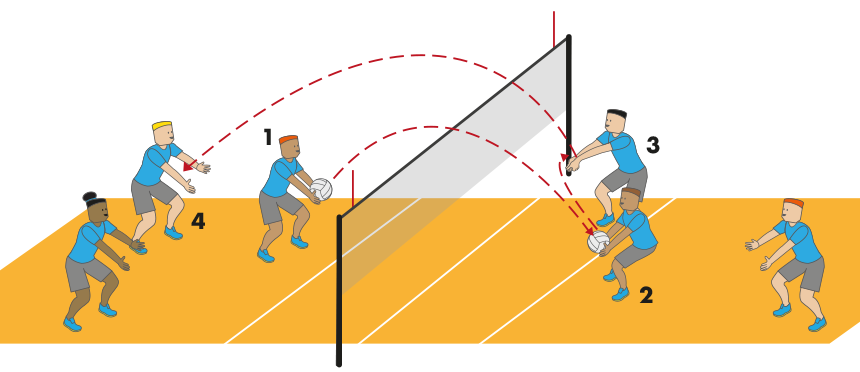
Description: progression from ‘throw and catch volleyball’ (p.9). Pupils play 3v3 or 4v4 volleyball with modified rules. The game must always begin with an underarm serve throw with no spin. Receiving team are allowed to catch the ball on their first touch, pass to the setter (player near the middle of the net), who then can pass the ball (preferably using the set pass technique) to a teammate who can hit the ball with any technique they like. Opposing team tries to continue the rally using the same sequence – catch – pass – hit. Play continues until the ball hits the floor, goes out of bounds, the ball is caught out of sequence, a player touches the ball twice in-a-row, or more than 3 touches have been made. Assign a point to the team that won the rally. Winning team serves.
Teaching Points
- Keep your eyes on the ball and be alert
- Knees bent, hips flexed, weight on the balls of feet
- Move early to the ball
Questions
- How can we be ready to react and move to the ball?
- What is the benefit of using all three touches in an attack?
- Why is important to have player acting as a setter near the net?
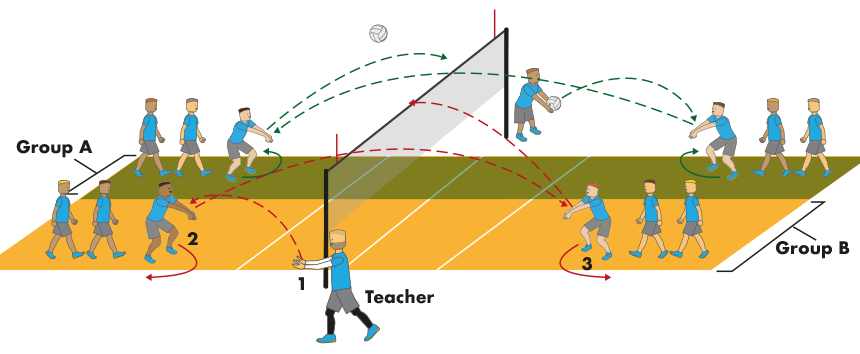
Description: Students work in groups of 6, three players on opposite sides of the court in a line. Teacher or pupil stands off the court by the sideline post, playing the role of feeder. From here the feeder throws the ball underhand high and looping to the front player in the line. This player then hits the ball over the net to the front player on the opposite side of the court, and then moves to the back of the same line. Receiving player tries to return the ball back over the net again with one-touch. The aim of the activity is to maintain a rally with the players on the opposing side as long as possible. When the rally comes to an end. The ball is returned to the feeder, and the process starts again. This activity works well with two groups on a court, who can compete against each other trying to get as many hits in-a-row as possible.
Teaching Points
- Hips flexed, leaning forwards aligning shoulders over your knees
- Place back of hand in the palm of the other, palms facing up
- Wrists together to create a flat platform for the ball to bounce off
Questions
- Why is skill repetition important?
- What skills are being developed during this challenge?
- How do you determine what shot technique you would use?
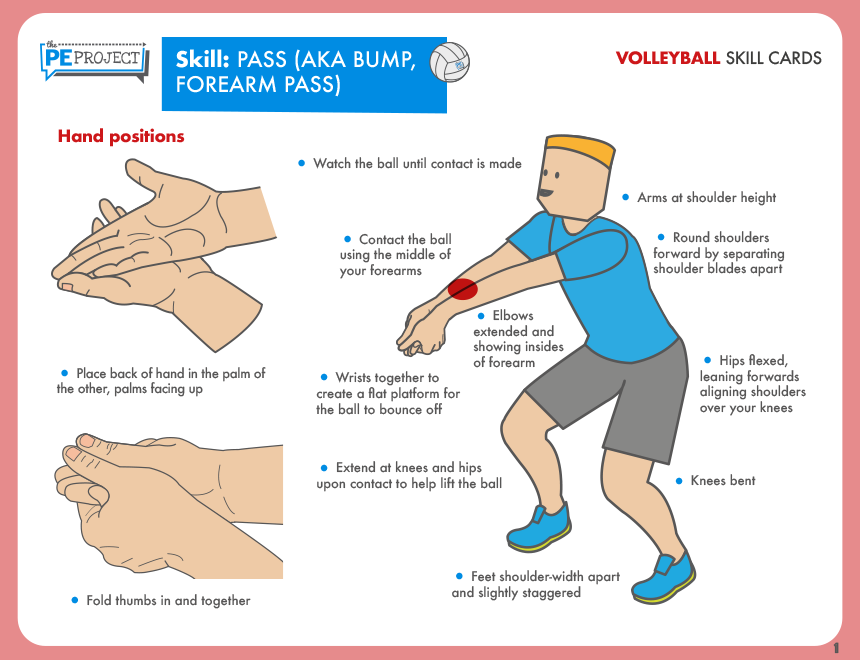
Skill Cards: When teaching Volleyball it can be extremely useful for students to use skill cards to deepen their understanding of skill techniques. For example, when trying to teach students how to execute a Pass (aka Bump, Forearm Pass) they could use the above skill card to learn about the technique with a partner. Then they can take turns practicing the skill whilst their partner observes and gives feedback. This is an example of a 'Reciprocal Teaching Style' which you can learn more about in our 'Teaching Styles' article.
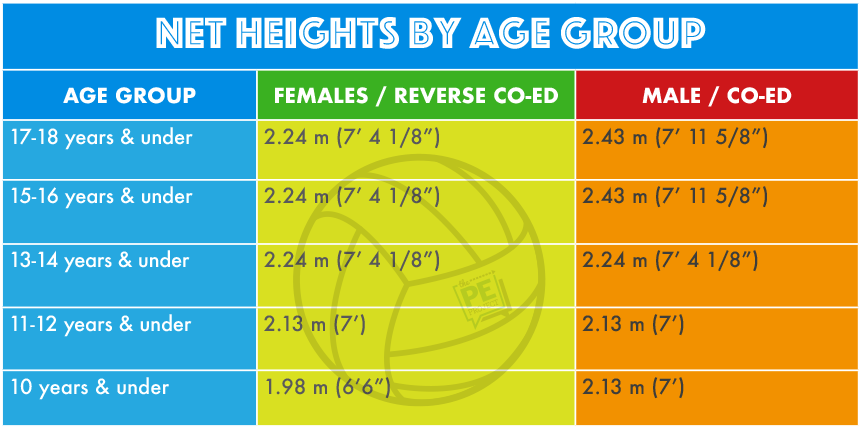
Teaching Considerations: When teaching Volleyball to children it is important to consider: What net heights students should you use depending upon their age and gender. We hope that the above table will help you answer those questions quickly and confidently.
The Full Volleyball Pack
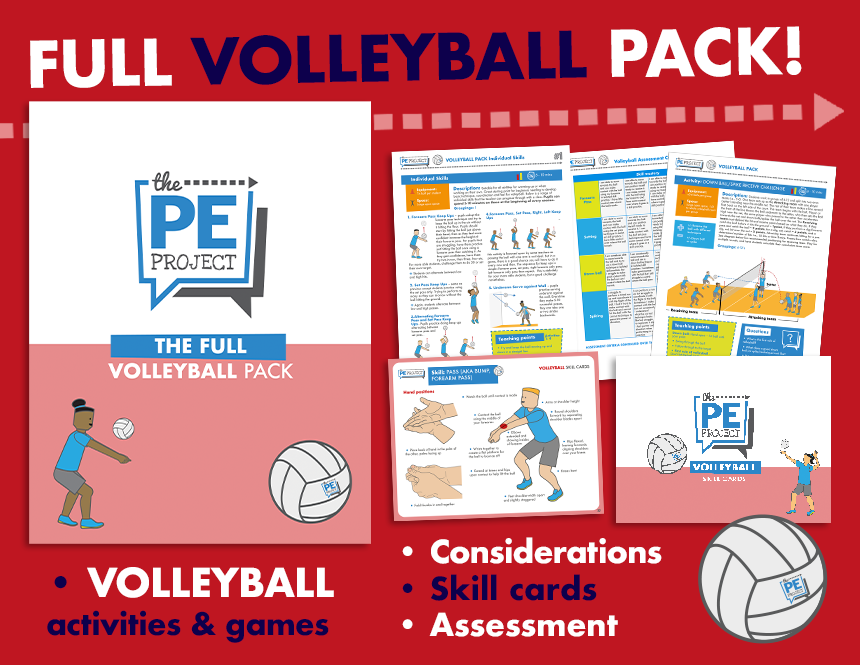
Would you like more Volleyball activities? If so, then this pack is for you! It has been developed by highly-qualified and experienced PE teachers for specialists and non-specialists alike who want to deliver fun, engaging Volleyball lessons where students can make exceptional progress.
In the Full Volleyball Pack by the PE Project you will find:
- Lots of Volleyball activities
- Skill Cards
- Suggested Sequence of Lesson Plans
- Assessment Criteria
- Volleyball Considerations
- Plus lots of additional extras like questions, teaching recommendations, differentiation strategies.