
When teaching Track & Field in Physical Education lessons, it is helpful to have a range of activities, teaching models and styles in the toolbox to help ensure students make great progress. Track & Field lessons can be delivered in a range of ways depending upon the age, group size, resources available and your subject knowledge.
If teaching Elementary (Primary/KS1 & KS2) you may want to opt for a range of fun partner and team games. From relay running activities to jumping and throwing challenges you can do with minimal equipment. For Middle-School (KS3) and High-School (KS4 & 5), students can begin to experience a broader range of complex skills and participate in a range of fun and competitive tasks and challenges that will help them develop their knowledge and skill technique in a variety of track and field events.
Below are a few Track & Field activities, an example skill card and teaching considerations from our ‘Full Track & Field Pack’ that you can use in your lessons.

Description: Have pupils in teams of 4-6 in a straight line approximately two-arm’s lengths away from the person in front. All teams start behind the same line, and the player at the back of the line begins with the baton. On “GO!” each team must stand still and pass the baton to the person in front until it arrives at the front of their line, this player must then sprints to the opposite line (approx. 15-25m away), then sprints back behind a rear cone (approx. 5-7 meters behind their line) and begin the process of passing the baton again. This continues until each team member has ran once each. When the last player returns all players must sit down to show that they are finished.
After each race, the teacher should add a new rule to make students begin to start showing good relay changeover technique. Progressions could be as follows:
- No instruction
- No looking behind
- Use a verbal cue “stick” or “hand”
- Pump arms
- Eyes closed when baton not in hand
- Baton must alternate between hands left – right – left – right)
- Upsweep technique only
- Downsweep technique only
- Push Pass technique only
Make it competitive: After each race, the first place team will be awarded the maximum number of points (if 5 teams then 5 points), and then each team the subsequence number of points depending on their finishing position (i.e., 2nd place = 4pts; 3rd place = 3pts; 4th place = 2pts; 5th place =1pt).
Teaching Points
- Stretch arm back straight to receive baton
- Face forwards
- Alternate between hands
- Use verbal cue “hand” or “stick”
Questions
- Why do we want to receive the baton on the move?
- To successfully changeover the baton quickly, what should we do?
- Which changeover technique is safest? Why?
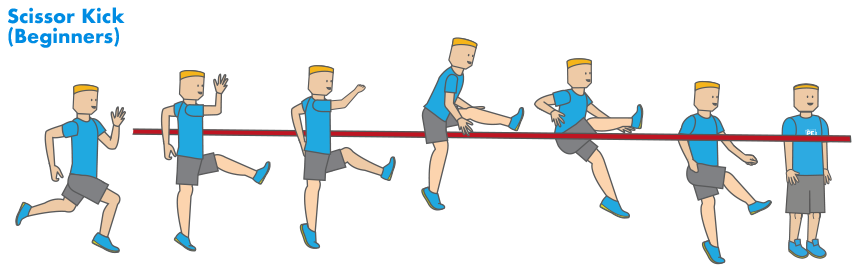
Description: Set up the high-jump mats, and if possible begin by using a foam bar if possible. Obviously start with a low-height, and place cones like in the diagram below to encourage pupils to have a curved run-up. Allow students to explore taking off from the left and right sides, and using the High-Jump skill card to support their learning. After pupils have had successful attempts clearing the bar, raise it by approximately 2cm.
Teaching Points
- Run in at an angle of 30˚
- Fully extend the take-off leg at hip, knee and ankle
- Drive the inside leg upwards – keep it high after take-off
Questions
- How many attempts does a jumper have to clear the bar in high-jump?
- What is the best angle to approach the bar at?
- What is the difference between a scissor and fosbury flop technique?
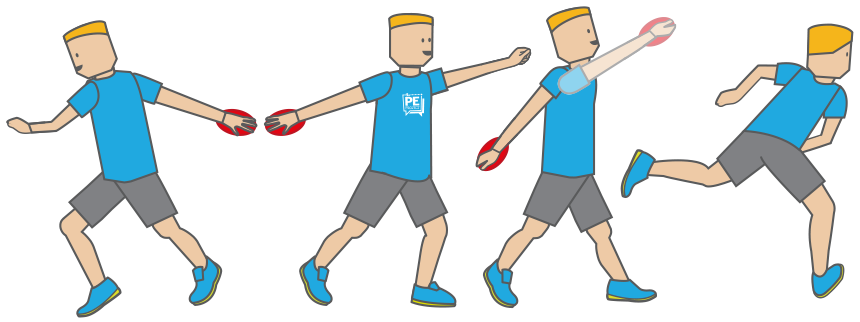
Description: Mark out two lines of cones approximately 15-25meters apart. The front line of cones should have the discus next to them, and the second row is the safety area for non-throwers. Have pupils work in pairs, where they take in turns to throw the discus. Spend most of the first lesson working on standing throw technique before progressing on to rotary technique. In the safety zone, have copies of the discus skill cards which they can refer to.
Safety First: Use the commands “On your marks”, “Set”, “Throw”, “Collect”, making sure all students understand that all throwers must throw on the command, and can only collect when teacher says so. This is vital, and if pupils are not listening to instructions then this activity is too risky for them to engage in. Make sure students do not throw or roll the discus to each other, but rather behave in a sensible and mature manner.
Alternatively: for beginners to discuss, have pupils roll the discus instead of throw, aiming to roll it along the ground like a bowling ball, trying to make the discus roll off of their index finger.
Teaching Points
- Rest the discus across the finger pads
- Swing discus back behind the rear hip and bend rear leg
- Drive the hips forwards forcefully and swing arms from high to low
Questions
- How should we hold a discus?
- Which part of your hand should the discus come off last?
- What does a good discus technique look like?
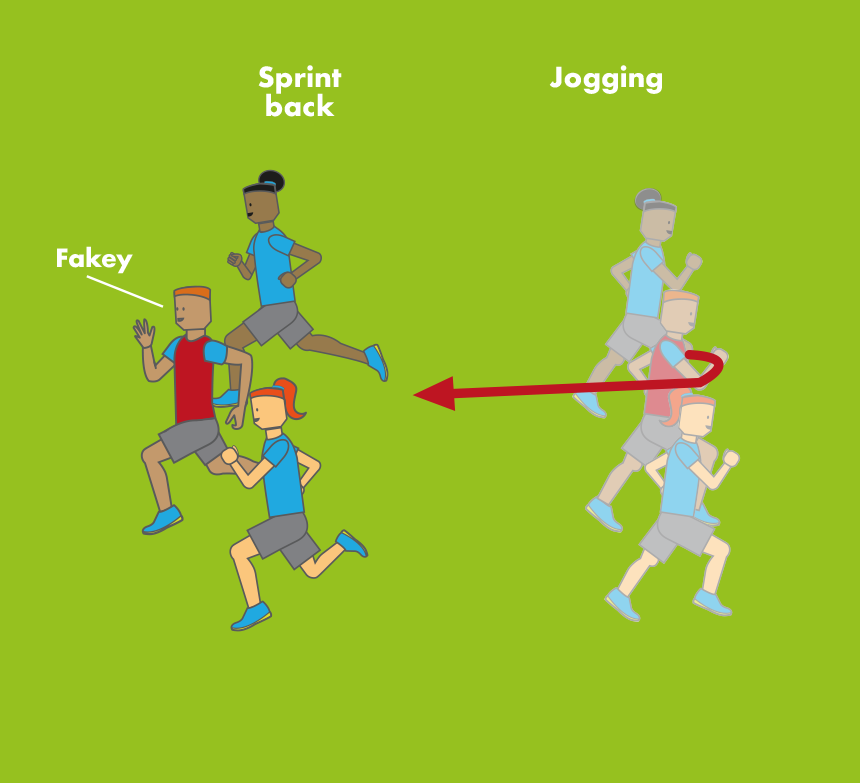
Description: This activity can be performed in pairs or even small groups. Students start by standing on a line together (shoulder to shoulder), and the person in the middle is “fakey”. When fakey starts jogging forwards the other members of the group must stay in line with them by moving at the same pace. At any point, fakey must turn and sprint back to the start line trying to get there before their teammates.
However, in order to try and trick them, fakey is allowed to pretend to turn at various points. Once pupils have sprinted back to the line, another pupil becomes “fakey”. Play long enough so that all students have at least one chance each at being fakey.
Top Tip: Demonstrate this as a whole-class first, with the teacher or able student as fakey. Then have them split into their pairs of smaller groups.
Teaching Points
- Fake with your head and shoulders
- Turn quickly, foot at 45˚angle
- Sprint on the balls of your feet
Questions
- What ways can you fake?
- When did you decide to sprint?
- What does a good sprinting technique look like?
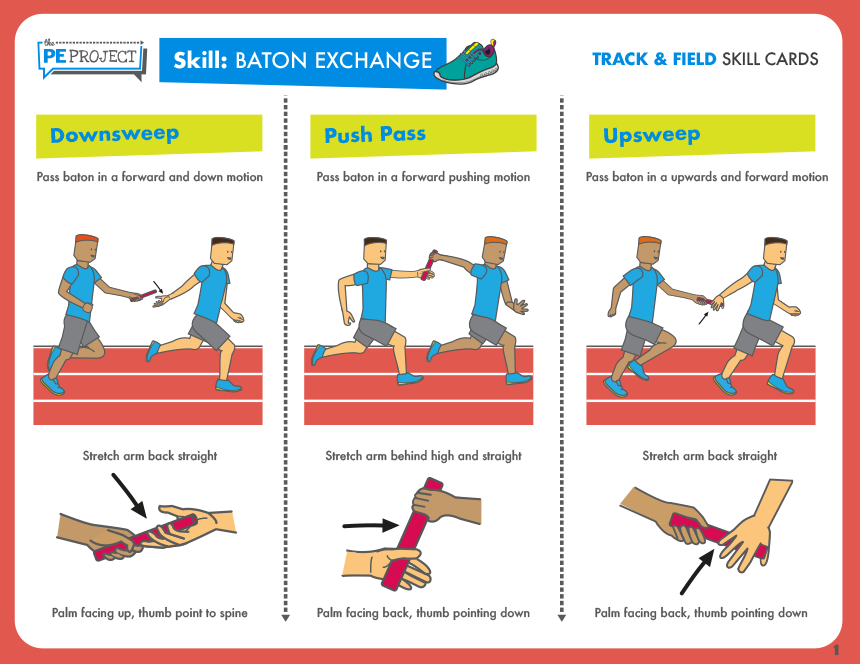
Skill Cards: When teaching Track & Field it can be extremely useful for students to use skill cards to deepen their understanding of complex skills. For example, when trying to teach students baton exchange in Track & Field with correct technique, they could use the above skill card to read over with a partner or in teams. After, they will then take turns practicing baton exchange and will try and give feedback to one another. This is an example of a 'Reciprocal Teaching Style' which you can learn more about in our 'Teaching Styles' article.
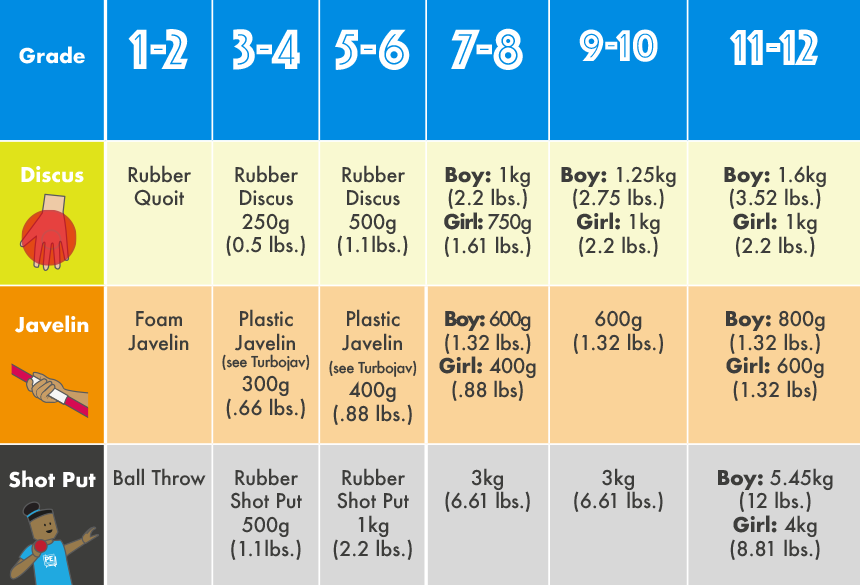
Teaching Considerations: When teaching any activity to children it is important to consider: What grade are they in? What size equipment should they use? We hope that the above table will help you answer those questions quickly and confidently.
The Full Track & Field Pack
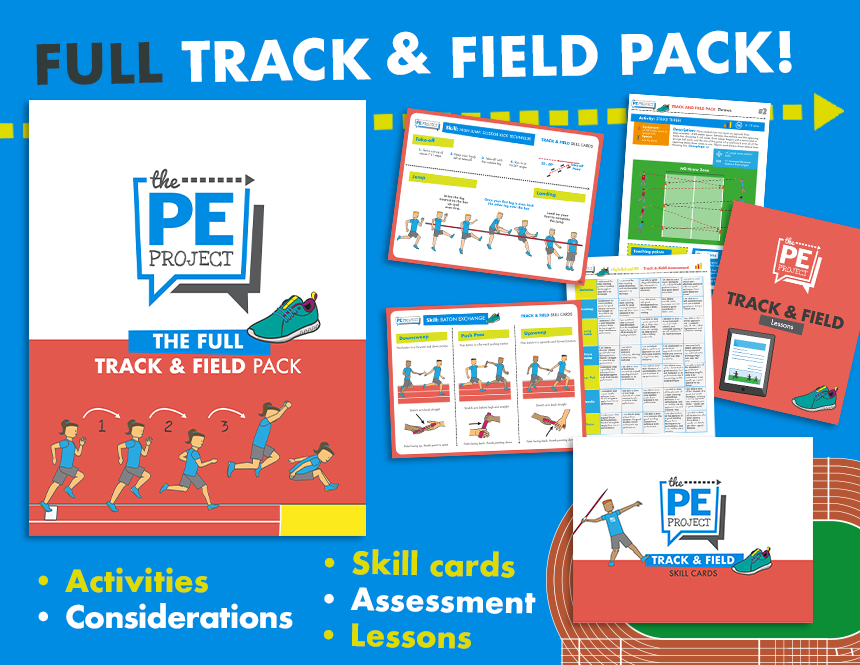
Would you like to deliver high-quality Track & Field (Athletics) lessons in your PE class? If so, then this pack is for you! It has been developed by highly-qualified and experienced PE teachers for specialists and non-specialists alike who want to deliver fun, engaging Track & Field lessons where students can make exceptional progress.
In the Full Track & Field Pack by the PE Project you will find:
- Lots of Track & Field activities and games
- Skill Cards
- Lesson Plans
- Assessment Criteria for Elementary, Middle-School, and High-School
- Plus lots of additional extras like questions, teaching recommendations, differentiation strategies.